Configuring VLANs in Proxmox VE
Making VLANs accessible to your VMs and LXC containers!
Ever needed to configure VLANs in Proxmox VE and couldn't figure it out? Here's how!
Running multiple VLANs over one physical NIC can be especially useful in cases where you need to have multiple different VLANs available to your VMs and want to avoid plugging in one NIC per network/VLAN.
In my case I had already configured two VLANs on my switch: VLAN 10 and VLAN 178. My Proxmox VE node already had an IP-Address assigned in the 178 VLAN and I wanted to avoid switching IP-Adresses at all cost.
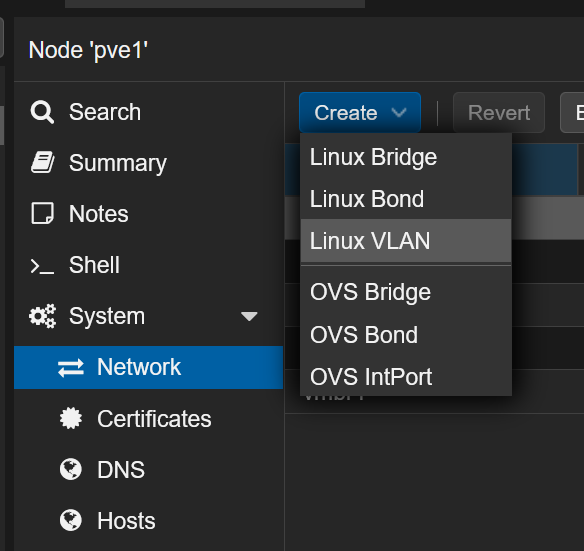
First, head into the web UI of your Proxmox VE node, click your node and expand the "System" menu. Under that you'll find "Network", which is exactly what we need.
Most likely all you'll see here for now is your physical NIC (for example "enp0s31f6") and the default vmbr0 bridge that Proxmox added.
The first thing we will do is to click "Create" and choose "Linux VLAN".
Next, input the name of your physical NIC followed by a dot and the VLAN number into the "Name" field. In my example, the NIC was called "enp0s31f6" and the VLAN I wanted to add had the VLAN ID 10, so I named it "enp0s31f6.10".
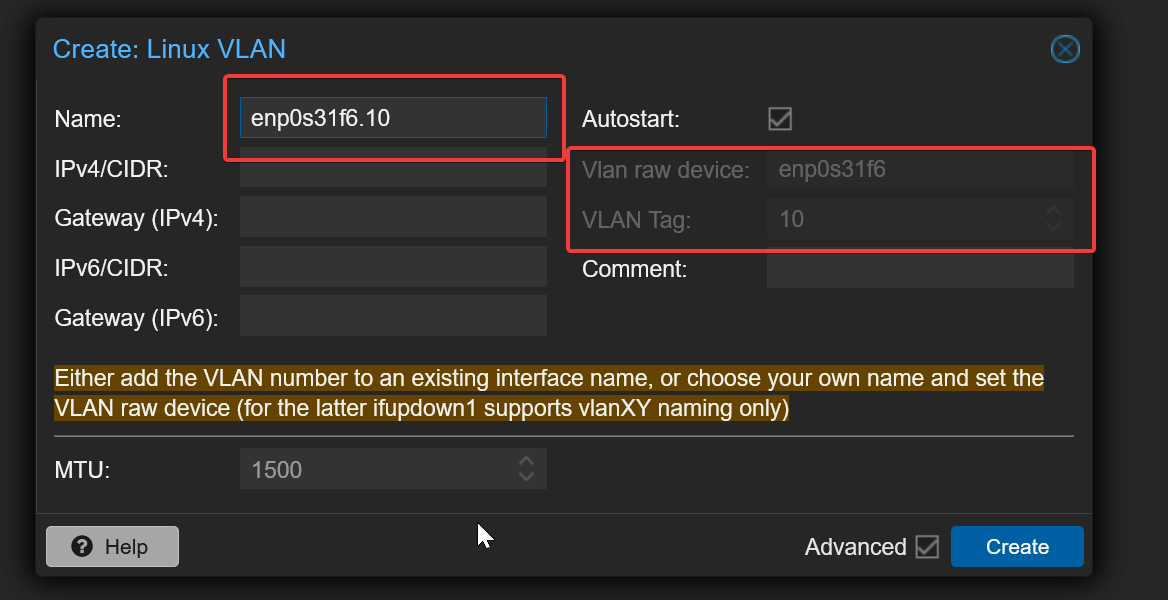
As you can see, Proxmox automatically noticed that we were going to add a VLAN interface as a sub-interface of the physical NIC and filled out the VLAN Tag and VLAN raw device fields.
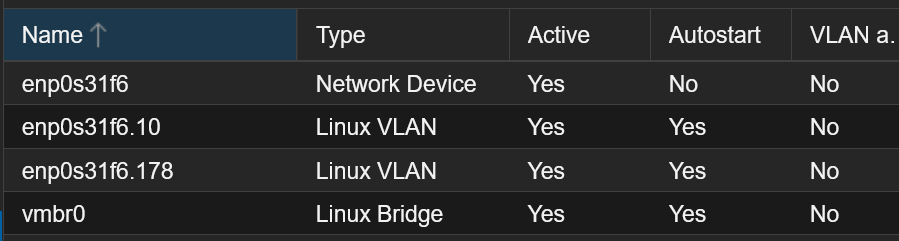
Click "Create" to add the VLAN interface. Repeat the same step for all your other VLANs. You should now be left with something like this:
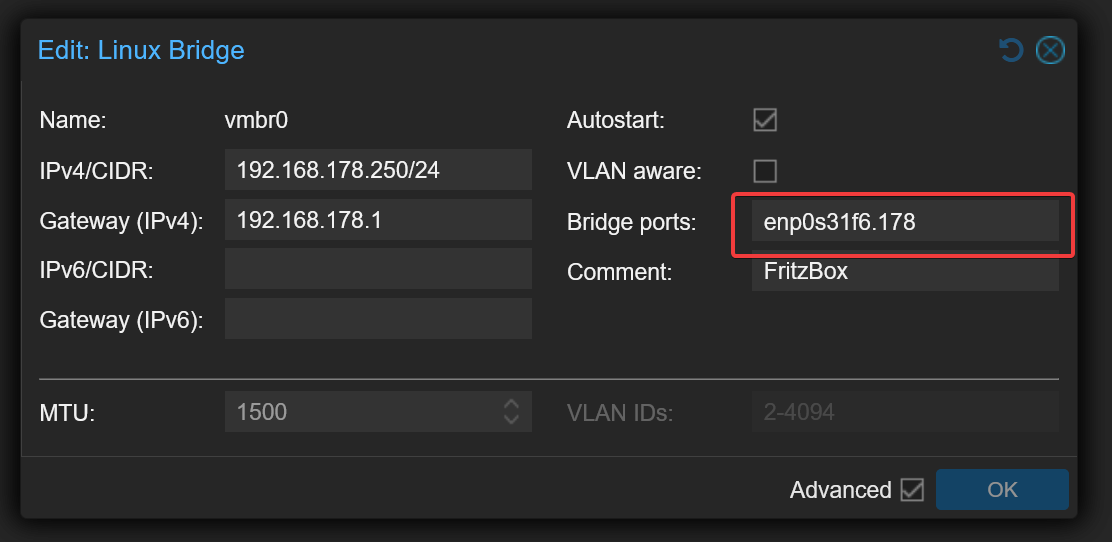
Next, edit the existing vmbr0 bridge. We'll tell it to use the VLAN interface we added as its bridge port instead of directly using the physical NIC. In my case, I'm going to assign the vmbr0 bridge to the 178 VLAN (enp0s31f6.178).
Since the vmbr0 bridge already has an IP-Adress configured that I use to access Proxmox (in VLAN 178), the only thing we'll have to change is the bridge port.
Edit the bridge and set the bridge port to the new VLAN interface we added earlier, in my case I changed it from "enp0s31f6" to "enp0s31f6.178".
This means: we need one bridge per VLAN. Simply add another bridge (Create -> Linux Bridge), fill out the bridge name and ports and you're done. For my VLAN 10 it looks like this:
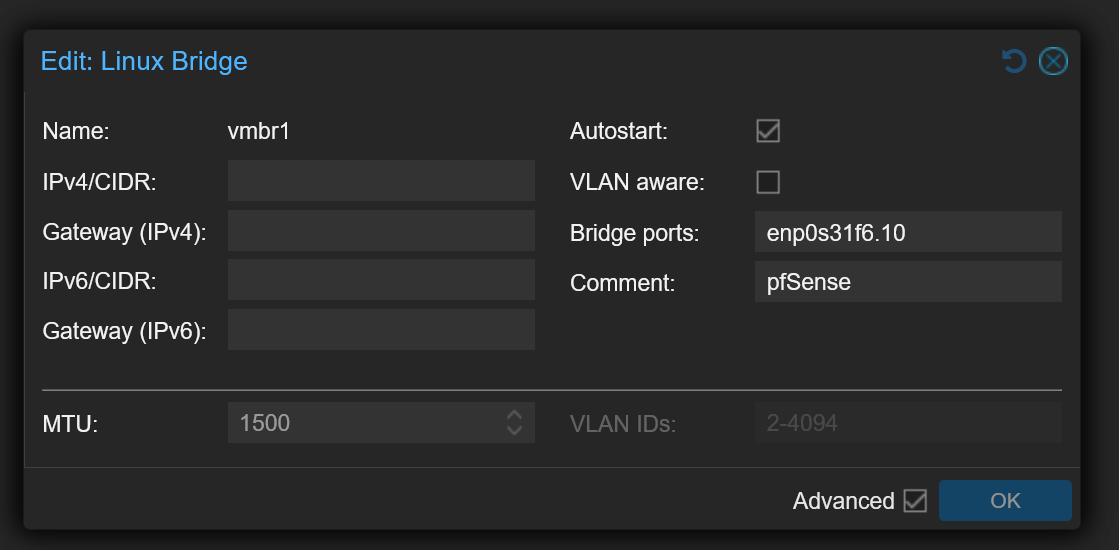
The IP-Address fields can be left empty since my Proxmox node already has an IP-Address assigned on vmbr0 in the other network (VLAN 178).
You should now be left with something like this, depending on your configuration, amount of VLANs and such:

Next, click on "Apply Configuration" to have Proxmox apply your changes.
You might notice your node going down after applying the changes. That's because you now need to configure the respective port on your switch to send tagged traffic.
I simply SSH'ed into my Cisco switch, set the port that the Proxmox Node is connected to as a trunk port (switchport mode trunk) and added both VLANs to it.
After that, my Proxmox Node came back online and I was able to access both VLANs successfully after assigning both bridge ports to the needed VMs.